
Puttying and preparation for painting step 4 home renovation

Puttying and preparation for painting step 4 home renovation

Puttying and preparation for painting

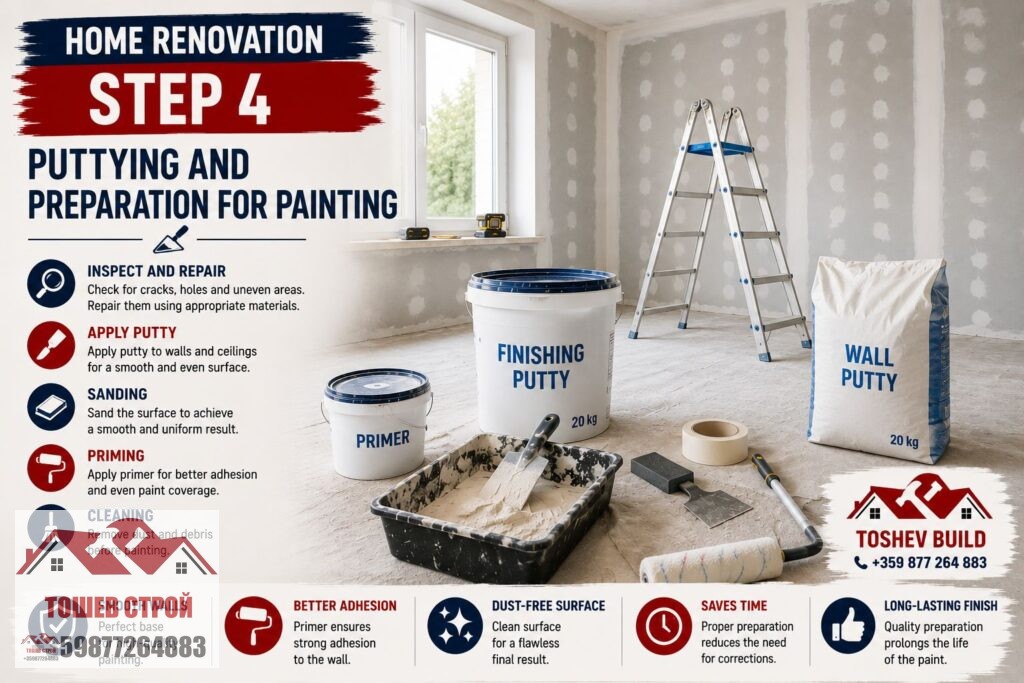
Puttying and preparation for painting should be carried out on a sound, dry, and properly prepared surface. Puttying is a key stage before painting because it determines the condition of the substrate beneath the final coating. Even high-quality paint cannot compensate for poorly levelled walls, visible joints, or untreated cracks.

Before starting work, it is important to assess the condition of the walls or ceiling. Some surfaces require only local repairs. Others need complete levelling. The type of substrate, the material used, and the intended finish determine the exact working method.

Inspection and preparation of the substrate

Before applying putty, the wall should be inspected carefully. Loose areas, peeling coatings, and contaminants must be removed. The substrate should be clean, dry, and sound. On previously painted walls, the condition of the existing coating should also be checked. Poorly bonded layers should not remain beneath the new putty.

Cracks, holes and local defects

Individual defects should be repaired before overall levelling begins. Cracks and holes must be prepared according to the type and condition of the substrate. When working with drywall, the joints between the boards also require treatment. Screw heads should be properly covered as well. The surface can then proceed to the next stage of levelling.

Puttying according to the condition of the walls

Puttying does not always involve the same amount of work. On relatively even walls, local repairs and fine smoothing may be sufficient. More noticeable irregularities require more extensive levelling. The number of coats depends on the substrate and the desired quality of the finished surface. This also determines the subsequent treatment.

When working with drywall, the joints require separate attention. They are treated with a compatible jointing system and suitable tape. Filling coats and final smoothing follow. A full fine skim coat may also be required. The aim is to ensure that transitions between individual areas remain invisible after painting.

What should be checked before applying putty

Proper preparation prevents work on a surface that does not have sufficient strength. All problematic areas should be identified before work begins. Particular attention should be given to areas around joints, openings, and previous repairs. The substrate must be suitable for the specific material used for levelling.

  • Check for loose and unsound areas.
  • Remove residues of peeling coatings.
  • Repair cracks and holes in advance.
  • Remove dust, grease, and other contaminants.
  • Use a suitable primer when required by the substrate.

Sanding and levelling the surface

Once the putty material has dried sufficiently, sanding can begin. Its purpose is to remove minor irregularities and transitions between individual areas. The work should be carried out carefully to avoid unnecessary damage to the finished layer. After sanding, the wall should be inspected again because some defects become easier to see.

If scratches, dents, or other imperfections are found, local corrections should be made. These areas must also dry before further treatment. Sanding dust should not remain on the wall. It can affect the adhesion of the next layer. The surface should be cleaned thoroughly before priming.

The walls should be checked before priming

Inspecting the surface is the last opportunity to correct minor defects easily. After primer or paint has been applied, corrections become more time-consuming. It is useful to inspect the walls under different lighting conditions. Side lighting often makes small irregularities more visible. This allows problem areas to be corrected in time.

  • Check the transitions between puttied areas.
  • Inspect corners and areas around openings.
  • Look for scratches, dents, and tool marks.
  • Apply additional material locally where necessary.
  • Remove all dust after further sanding.

Priming before painting

Priming should be carried out on a properly prepared surface. The type of primer must be suitable for both the substrate and the intended paint. New drywall, puttied areas, and certain mineral surfaces may have different absorption rates. A suitable primer helps create a more uniform substrate before the final coating is applied.

Before priming, the wall should be dry and free from dust residues. Products from different systems should not be combined without checking their compatibility. The safest approach is to follow the manufacturer’s technical instructions. These specify the application method, required conditions, and drying time. Painting can begin after the primer has dried.

Why primer should not be skipped when required

Different absorption levels across the substrate can affect the appearance of the finished painted surface. This is particularly important on new surfaces and repaired areas. Primer should be used according to the specific system and the condition of the wall. It is not a universal product, so its selection must match the substrate and the subsequent coating.

Preparing the room for painting

Before applying paint, surfaces that will not be painted should be protected. Floors, windows, doors, and installed elements should be covered according to the specific situation. This reduces the risk of stains and unnecessary cleaning afterward. There should also be enough space for safe work and movement.

The work area should also be prepared according to the conditions specified for the paint being used. Temperature, humidity, and drying times may vary between products. The same drying period should not be assumed for every type of paint. The manufacturer’s technical information should be followed throughout the process.

Final inspection before the first coat of paint

Before painting, it is advisable to carry out one final inspection of all surfaces. Once paint application begins, some defects may become more noticeable. Minor corrections are better completed beforehand. The wall should then be cleaned again and left in a suitable condition for painting.

  • The surface should be dry and clean.
  • No sanding dust should remain.
  • All local repairs should be completed.
  • Protective coverings should be securely positioned.
  • Paint and tools should be prepared according to the instructions.

Conclusion

Puttying and preparation for painting is a stage where attention to the substrate has a direct impact on the final result. Cleaning, repairs, levelling, and sanding should be completed in the correct sequence. Each subsequent operation should begin only after the previous layer has dried sufficiently. This creates a suitable surface for priming and painting.

Good preparation comes before quality painting

The final colour is the last part of the process, not a solution to problems beneath it. Irregularities and defects should be corrected before the final coating is applied. When the substrate is properly prepared, painting can begin on a clean and stable surface. This is why preparation should never be treated as a secondary part of the renovation.

If you need puttying and preparation for painting, as well as other construction and renovation services, contact us.

Follow us on Facebook

PARTHNERS

FOLLOW US:

RELATED SERVICES WITH PUBLICATION

Self-leveling screeds

Саморазливни замазки София, от Тошев Строй - Self-leveling screeds in Sofia

Self-leveling screeds are a modern solution for creating a smooth, durable, and aesthetically finished floor base. Toshev Stroy offers professional application of self-leveling screeds, tailored to the technical requirements of each site and the individual needs of the client. With extensive experience and a high standard of execution, the company ensures reliability, longevity, and uncompromising quality.

DRYWALL

Шпакловка - СТРОИТЕЛНО РЕМОНТНИ УСЛУГИ

With TOSHEV STROY, you infuse your home with the quality and innovation you deserve. Our experienced team offers drywall solutions designed to transform your interior with elegant and functional systems. Whether it’s about installing suspended ceilings, constructing

Floor and tile repair

Под и плочки - Floor and tile renovation 1

Tile installation is one of our primary services that transforms the interiors of both homes and office spaces. Our experienced team focuses on every detail to create a finished look that seamlessly combines aesthetics and functionality, using high-quality materials and modern installation techniques.

REQUEST FOR INSPECTION