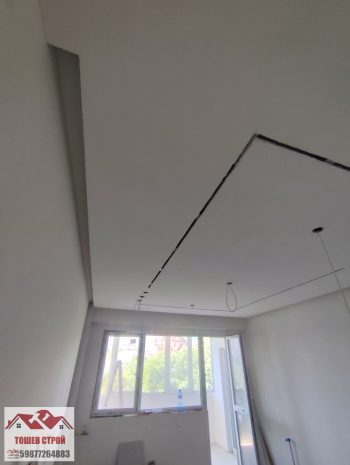
Winter apartment renovation
A winter apartment renovation can be completed successfully when the rooms are enclosed, the heating works reliably, and the schedule allows enough time for materials
Bathroom waterproofing during an autumn renovation is a stage that should be planned before the delivery and installation of tiles. During this season, renovation work often takes place alongside other interior projects, so the schedule should allow time for surface preparation, application of the system and drying. When carrying out a major renovation in autumn, do not assume that cooler weather automatically prevents indoor work. The conditions in the room must meet the requirements for the materials being used. This allows the next stage to begin on a dry, stable and properly prepared surface.
Ceramic tiles and grout do not, by themselves, create a continuous waterproof barrier. Water can penetrate joints and gaps around pipes, then reach the substrate. A waterproofing layer is applied beneath the tiles to reduce this risk in areas exposed to splashes and frequent moisture. It is especially important around the shower, bathtub, drain and floor-to-wall joints. Before work begins, confirm which areas need treatment and which system components are required for the selected product.
Bathroom waterproofing comes after the concealed installations are complete and the walls and floor have been prepared. Before application, the locations of pipes, drains and sanitary fixtures should be finalised. If demolition or plumbing changes are needed after the waterproofing has been applied, the protective layer may be damaged and require repair. For this reason, coordinate this work with the plumber, tiler and the rest of the schedule. When planning a major home renovation, this sequence helps prevent repeated work.
First, inspect the walls and floor for crumbling areas, dust, grease, adhesive residue and cracks. Remove unstable layers and repair defects with materials suited to the substrate. The surface must be sufficiently sound and even for the selected system. Do not apply waterproofing over an active leak or moisture of unknown origin. The cause must be addressed first, because the coating does not replace repairs to a damaged pipe or construction defect. If you suspect a problem with the plumbing, have it checked by a plumbing repair specialist.
After removing the old finishes, clean the substrate carefully. Dust and loose particles can interfere with adhesion. Use primer only when it is specified as part of the system and is compatible with the surface and waterproofing material. Follow the manufacturer’s instructions for dilution, application and waiting times. Do not apply the next layer over a wet or dirty surface unless the technical instructions explicitly allow it. Careful preparation is often essential for an even coating and a reliable bond to the walls and floor.
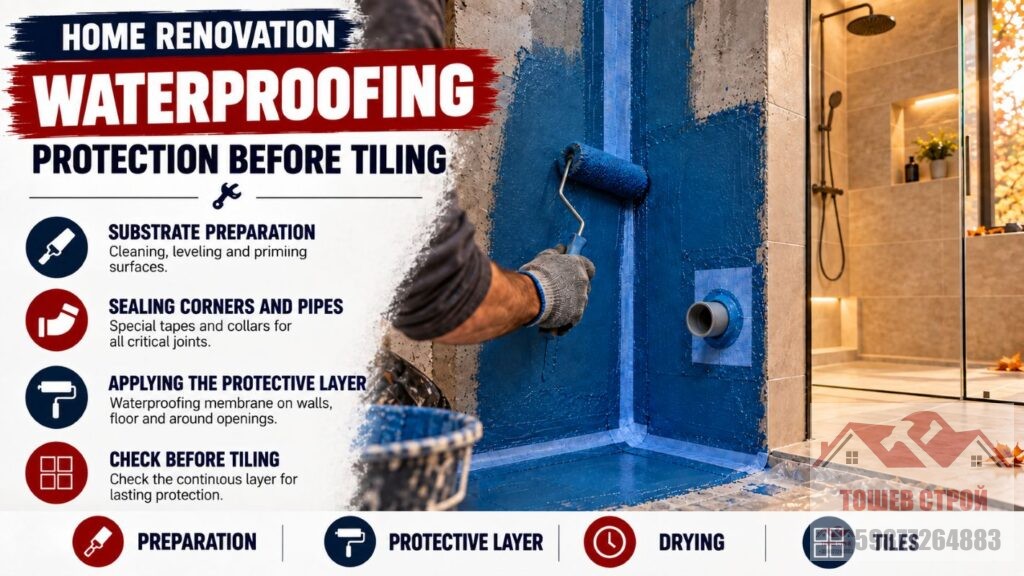
The most vulnerable areas are usually the joints between horizontal and vertical surfaces, corners, pipe outlets and the floor drain. Use system tapes, collars or other formed components there when specified by the manufacturer. Embed them in the coating as directed so the joint remains continuous. Simply applying extra material over a visible edge is not enough. The area around the drain must also allow water to flow away correctly without pooling. Plan these details around the fixture locations and the thickness of the future tile finish.
Before starting, mark where pipes emerge from the walls or floor. Seals around them must fit closely, without folds, gaps or breaks. Treat internal corners and the floor-to-wall transition with suitable tapes if required by the system. At the drain, check that the selected components are designed for that model and can be connected to it. The manufacturer’s instructions are important for these joints. For example, Ceresit’s bathroom waterproofing guide explains how to work with coatings and sealing tapes.
Use a brush, roller or another tool specified in the technical instructions. Spread the material evenly, avoiding missed areas, overly thin patches and puddles. Some systems require more than one coat; the direction, thickness and interval between coats depend on the specific product. Do not combine a coating from one system with tapes or primer from another without checking compatibility. Use a complete solution approved by the manufacturer. For information about the intended use and limitations of a specific product, see the technical data for Ceresit CL 51.
In autumn, temperatures and humidity can vary noticeably from day to day. However, conditions inside the bathroom matter more than the outdoor forecast. Check the product’s permitted temperature and humidity ranges, and maintain them during application and drying. Do not speed up the process with a directed heater, intense heat or a draught unless the manufacturer permits it. Ventilate carefully to avoid sudden temperature changes and keep dust from settling on the fresh layer. Do not judge the drying time by feel or appearance alone; follow the time stated in the technical data sheet.
Before tiling, make sure that every layer has been applied and has dried in accordance with the system requirements. Check the surface for missed areas, mechanical damage, bubbles or visibly uneven coverage. If you find a defect, repair it according to the manufacturer’s instructions before continuing. Do not puncture or scratch the coating while carrying materials and tools. Once this check is complete, install the tiles using a suitable adhesive. See the service for tile installation in Sofia for the next stage of the renovation.
Problems most often arise from rushing, skipping preparation or ignoring the instructions. A dusty surface may be coated, corners may be left untreated, or tiling may begin before the required drying time has passed. Another risk is an interruption in the layer around pipes and drains. If the coating is cut or punctured during later work, repair the damaged area before tiling. Do not try to compensate for defects by applying more material in one spot without checking whether that is appropriate. Follow the system instructions instead of combining incompatible solutions.
During a major renovation in autumn, bathroom waterproofing is one stage in a sequence, not a standalone task. Confirm in advance who will prepare the substrate, apply the system and check readiness before tiling. Order materials in time and store them under the conditions specified by the manufacturer. Allow time in the schedule for preparation and drying instead of planning the next work for the same day. If the entire home is being renovated, coordinate the bathroom with the other construction and installation work. The pages about bathroom renovation and finishing renovations can help clarify the scope of the work.
A reliable result depends on a sound substrate, carefully treated details, compatible materials and adequate drying time. Autumn itself does not prevent bathroom work, provided the conditions in the room meet the technical requirements. Before tiling begins, check the integrity of the layer and repair any damage. This makes waterproofing a planned and verifiable part of the renovation, rather than a hidden stage completed in a rush.
Follow us on Facebook

A winter apartment renovation can be completed successfully when the rooms are enclosed, the heating works reliably, and the schedule allows enough time for materials

Bathroom waterproofing during an autumn renovation is a stage that should be planned before the delivery and installation of tiles. During this season, renovation work

Construction renovation with a contract is a service in which the conditions between the client and the contractor are defined in writing before the actual

Finishing works and handover of the property is the final stage of a complete home renovation. The main construction work has already been completed, but

Finishing works and handover of the property is the final stage of a complete home renovation. The main construction work has already been completed, but

Puttying and preparation for painting should be carried out on a sound, dry, and properly prepared surface. Puttying is a key stage before painting because

Puttying and preparation for painting should be carried out on a sound, dry, and properly prepared surface. Puttying is a key stage before painting because

Puttying and preparation for painting should be carried out on a sound, dry, and properly prepared surface. Puttying is a key stage before painting because

Once the planning, demolition, and dismantling work has been completed, the next key stage of the renovation begins. This is when all work related to

Once the planning, demolition, and dismantling work has been completed, the next key stage of the renovation begins. This is when all work related to
With TOSHEV STROY, you infuse your home with the quality and innovation you deserve. Our experienced team offers drywall solutions designed to transform your interior with elegant and functional systems. Whether it’s about installing suspended ceilings, constructing
Suspended ceiling with magnetic track lighting is a modern solution for creating a stylish and functional interior. It is a key design element that shapes the atmosphere, highlights architectural details, and influences the way we perceive a space. That is why more…
We provide professional bathroom renovation solutions where every detail matters. With over 15 years of experience in the field, we use high-quality materials and combine expert craftsmanship. With modern design to transform your bathroom into a cozy, functional.