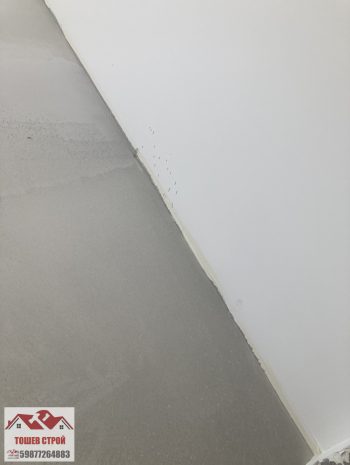

Flooring- doors and painting step 5 home renovation
- CONSTRUCTION BLOG
Flooring- doors and painting are among the activities that shape the final appearance of the rooms. The correct sequence is particularly important here. It reduces the risk of damage to already finished surfaces and prevents unnecessary corrections. The work must be adapted to the specific materials and conditions on site.
At this stage, the walls and ceilings should be prepared, and all wet processes should be completed. The substrates for the floor coverings must also meet the requirements of the respective material. The installation of interior doors is coordinated with the finished floor level. This allows dimensions, joints and transitions between the individual elements to be completed more precisely.
Preparation and installation of flooring
Before installing a floor covering, the levelness, strength and condition of the substrate are checked. For materials sensitive to residual moisture, it is measured using a method suitable for the specific system. Uneven areas may require additional levelling. Dust, weak areas and other contaminants are removed beforehand. The exact permissible values are determined by the manufacturer of the selected flooring and the materials used.
- check the substrate before starting installation;
- measure residual moisture when required by the material;
- level and clean according to the installation method.
Choosing flooring according to the room
The floor covering should be selected according to the load and intended use of the room. Porcelain stoneware and ceramic tiles are suitable for areas where water resistance and easy cleaning are required. Laminate, parquet and vinyl flooring have different requirements for the substrate and installation. With underfloor heating, materials explicitly approved by the manufacturer for such a system should be used.
- for wet rooms, choose coverings suitable for the specific conditions;
- for living areas, the choice depends on the load and desired type of flooring;
- with underfloor heating, check the compatibility of the entire flooring system.
Joints and transitions between different floor coverings
Transitions between rooms should be planned before the final installation of the floor coverings. Different materials may have different construction heights and specific joint requirements. This affects the finished floor level and the position of the doors. With floating floors, the necessary perimeter and separation joints are installed according to the manufacturer’s instructions, without restricting the movement of the flooring.
- coordinate the levels of adjacent floor coverings in advance;
- install the required joints according to the specific flooring system;
- select transition profiles according to the floor coverings and differences in height.
Installation of interior doors
The dimensions for interior doors should be coordinated with the final floor levels and finished walls. The frame is installed with the correct geometry so that the door leaf operates without rubbing or unwanted movement. The fixing method depends on the manufacturer’s system. Before final completion, the opening, closing, lock and evenness of the visible gaps around the door leaf are checked.
- check the dimensions of the finished structural opening;
- level and secure the frame according to the installation system;
- after installation, check the door leaf, lock and fit.
When the doors are installed
The exact installation stage depends on the type of frame, flooring and organisation of the renovation. Final dimensions are usually determined once the finished floor level has been established. With some systems, the flooring must already be installed. Other systems allow a different sequence. Therefore, installation should be planned in advance rather than determined solely by a general rule.
- the finished floor level must be known before final measurements are taken;
- the sequence is coordinated with the specific frame and floor covering;
- the manufacturer’s instructions take priority for specific installation solutions.
Painting walls and ceilings
Final painting requires a dry, sound, clean and properly prepared substrate. After applying putty, the surface is sanded and dust is removed. The primer is selected according to the substrate and intended paint. It does not replace proper preparation, but it can even out absorption and improve application conditions. The paint is used at the temperature, humidity and drying time specified in the manufacturer’s technical documentation.
- check and clean the substrate before priming;
- the primer and paint must be compatible with the specific surface;
- observe the required intervals between individual coats.
Painting sequence
Work usually begins with the ceiling and then continues with the walls. Corners, areas around door frames and other details are treated carefully to achieve clean edges. The number of coats should not be determined simply by habit. It depends on the product, colour, condition of the substrate and coverage. Each subsequent coat is applied after the required interval.
- paint the ceilings first, followed by the walls;
- apply individual coats according to the instructions for the specific paint;
- protect finished floors, doors and other elements during the work.
Colours and assessment conditions
The selected colour may look different depending on the natural and artificial light in the room. The size of the painted area and the colours of adjacent surfaces also have an effect. A small test area on the wall provides a better indication than viewing a colour sample separately. The final assessment should be made after the paint has fully dried under the room’s normal lighting conditions.
- check colour samples directly in the specific room;
- observe the test area in daylight and artificial light;
- assess the final shade after the applied material has dried.
Correct sequence of final activities for flooring, doors and painting
There is no universal sequence suitable for every renovation and all materials used. The order depends on the flooring, type of doors, paint and installation methods. It is practical to complete the main painting before installing elements that can easily become stained. Final touch-ups, however, are often left until after the installation of frames, skirting boards, profiles and other finishing details.
- determine the finished levels and transition locations in advance;
- organise the activities so that finished surfaces remain protected;
- carry out the final corrections after the installation work has been completed.
Final inspection and finishing corrections
After the work is completed, the flooring, doors and painted surfaces are inspected. Visible joints, transition profiles, skirting boards and door operation are checked. Walls and ceilings are inspected for missed areas or marks left by subsequent installation work. Minor corrections are carried out before final cleaning, once all elements have been installed in their final positions.
Completion of step 5, flooring- doors and painting
Good coordination between the individual finishing activities has a direct impact on the final result. Flooring should be installed over a properly prepared substrate, doors should be coordinated with the finished floor, and paint should be applied under suitable conditions. When the installation requirements for the specific materials are followed, the need for subsequent repairs is reduced and the rooms can proceed to final furnishing.
If you need puttying and preparation for painting, as well as any other construction and renovation services, contact us.
Follow us on Facebook
PARTHNERS
FOLLOW US:

Flooring- doors and painting step 5 home renovation
Puttying and preparation for painting should be carried out on a sound, dry, and properly prepared surface. Puttying is a key stage before painting because

Puttying and preparation for painting step 4 home renovation
Puttying and preparation for painting should be carried out on a sound, dry, and properly prepared surface. Puttying is a key stage before painting because

Screeds and plaster – drywall – step 3
Once the planning, demolition, and dismantling work has been completed, the next key stage of the renovation begins. This is when all work related to

Home renovation – Step 2
Once the planning, demolition, and dismantling work has been completed, the next key stage of the renovation begins. This is when all work related to

Planning demolition and dismantling, the beginning…
Planning demolition and dismantling mark the beginning of every renovation project. Before upgrading a home, it is important to understand the correct order of apartment

10 reasons to paint with latex
Every home needs refreshing from time to time. One of the easiest ways to transform the atmosphere is with a new wall color. That is

Porcelain tiles and what we do not know about them
Porcelain tiles (granitogres) are among the most preferred materials in modern construction and home renovation. They are used for floors, walls, facades, and outdoor spaces.

Is plasterboard wall straightening a good solution?
A complete apartment renovation is a process in which a home is renovated from the ground up with the aim of improving its functionality, comfort,
RELATED SERVICES WITH PUBLICATION
Self-leveling screeds
Self-leveling screeds are a modern solution for creating a smooth, durable, and aesthetically finished floor base. Toshev Stroy offers professional application of self-leveling screeds, tailored to the technical requirements of each site and the individual needs of the client. With extensive experience and a high standard of execution, the company ensures reliability, longevity, and uncompromising quality.
DRYWALL
With TOSHEV STROY, you infuse your home with the quality and innovation you deserve. Our experienced team offers drywall solutions designed to transform your interior with elegant and functional systems. Whether it’s about installing suspended ceilings, constructing
Latex painting
We offer professional and modern latex painting services that not only refresh the interior of your home. But also infuse each room with a sense of freshness, coziness, and elegance. With our high-quality latex paints, designed to deliver exceptional visual effects, you also receive long-lasting protection for wall and top.